Strawberry Workshop
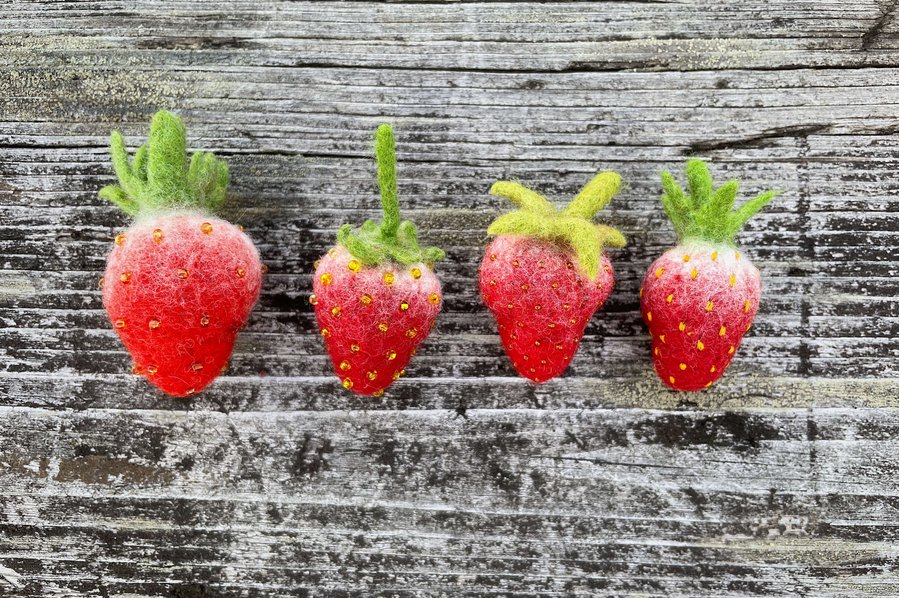
I felts one berry, picks up wool for another, a third is born in my head, and a fourth is dreamt of. With these berries it's impossible to stop - they're so delicious and easy to make, you want a whole basket. Strawberries would make a lovely accessory and good wet felting practice.
This free workshop is filled with summer, the delicious secrets of 3D wet felting and a huge boost of creative inspiration.
We will mostly use the wet felting technique, but also include some other techniques. You can work with absolutely any wool. The project is simple, but it can be used to create a variety of berries and fruits. Perfect for beginners.
In this workshop, I will show you how to felt a tasty berry from start to finish. We work together in a livestream. The livestream time is 1.5-2 hours.
What do we need?
- 1. Mat for wet felting. I use ribbed kitchen cupboard mat from IKEA shop. It sold in rolls in kitchen section of IKEA. You can find something similar.
- 2. Soap.
- 3. Water container.
- 4. Scissors with sharp tips.
- 5. Piece of mesh fabric (tulle, thin mosquito net or some fabric for tutu skirts), size A3 is enough. You can also use a piece of nylon stockings.
- 6. The material for the template - a piece of thick plastic bag or laminate underlay.
- 7. Needle felting tools: mat (dishwashing sponge is fine) and felting needle size 38, gauge star.
- 8. Wool: I make a strawberry from superfine Australian merino in ribbon (combed, tops) 18-20 micron. The wool can be absolutely anything: coarse, fine, combed or carded. It takes about 2-5 g of wool to make one berry, about 5-6 cm tall and 2-3 cm wide in its finished size. Colours: red, a little white and a little green. If you want wool decoration, a little yellow or brown for the seeds.
- 9. Decor for the berry as desired. The surface can be covered with viscose fibers for a glossy finish. Just a little bit is needed. The seeds can be made of wool to make a polka dot berry. You can embroider seeds or embroider with beads. For embroidery any thread will do (I have simple yellow sewing thread) - either sewing thread or woolen floss. Beads - 1 mm or 1,5 mm. Colour to taste: I have a yellow-brown range. Choose needles carefully so that the needle goes through the beads.
- 10. Chopstick.
- 11. Sewing thread and needle if you plan to embroider the berry or sew on beads.
- 12. A brooch clasp if you want to turn the strawberry into an accessory. You can also add a magnet (strong neodymium magnet, silver color) inside and make it a fridge decoration or a treat for a hand puppet bear, for example.
- 13. A measurement tape.
- 14. A hand towel.
When will the workshop be held?
The workshop will be held live in your personal account on July 22th at 20:00 Helsinki time (GMT+3). Join me, let’s felt together!
How to join the livestream?
To join the livestream you just need to do a simple registration on the website (you name, email and create your own password for setting your personal account). As soon as you register, you have a personal account on my website, where all the livestreams take place and all your purchased and free learning materials are stored. A recording of this livestream and workshop will also be stored there. In your personal account, select the sheep livestream picture, click on it, and it will take you to the livestream page. Have a good creative time!


